What is “Tier 0” in Storage Environments?
Tier "0" is not new in storage market but for implementation purposes it has been difficult to accommodate because it requires best performance and lowest latency. Enterprise Flash disks (Solid State Disks) capable to meet this requirement. It is possible to get more performance for company most critical applications. The performance can be gained through using Flash drives supported in VMAX and DMX-4 systems. Read More →
3) Virtual Provisioning Phase 2 - Support for MirrorView and SAN Copy replication on thin LUNs has been added.
The Storage Processor (SP) processes all I/Os, host requests, management and maintenance tasks, as well as operations related to replication or migration features.
In Navisphere Analyzer, the statistics for an SP are based on the I/O workload from its attached hosts. It reflects the overall performance of CLARiiON storage system. The following Performance Metrics will be monitored for each CLARiiON storage system.
A LUN is an abstract object whose performance depends on various factors. The primary consideration is whether a host I/O can be satisfied by the cache. A cache hit does not require disk access; a cache miss requires one or more disk accesses to complete the data request.
As the slowest devices in a storage system, disk drives are often responsible for performance-related issues. Therefore, we recommend that you pay close attention to disk drives when analyzing performance problems.
SP performance metrics
• Utilization (%)
The percentage of time during which the SP is servicing any request.
• Total Throughput (I/O/sec)
The average number of host requests that are passed through the SP per second, including both read and write requests.
• Read Throughput (I/O/sec)
The average number of host read requests that are passed through the SP per second.
• Write Throughput (I/O/sec)
The average number of host write requests that are passed through the SP per second.
• Read Bandwidth (MB/s)
The average amount of host read data in Mbytes that is passed through the SP per second.
• Write Bandwidth (MB/s)
The average amount of host write data in Mbytes that is passed through the SP per second.
LUN performance metrics
• Response Time (ms)
The average time, in milliseconds, that a request to a LUN is outstanding, including waiting time.
• Total Throughput (I/O/sec)
The average number of host requests that are passed through the LUN per second, including both read and write requests.
• Read Throughput (I/O/sec)
The average number of host read requests passed through the LUN per second.
• Write Throughput (I/O/sec)
The average number of host write requests passed through the LUN per second.
• Read Bandwidth (MB/s)
The average amount of host read data in Mbytes that is passed through the LUN per second.
• Write Bandwidth (MB/s)
The average amount of host write data in Mbytes that is passed through the LUN per second.
• Average Busy Queue Length
The average number of outstanding requests when the LUN was busy. This does not include idle time.
• Utilization (%)
The fraction of an observation period during which a LUN has any outstanding requests.
DISK performance metrics
• Utilization (%)
The percentage of time that the disk is servicing requests.
• Response Time (ms)
The average time, in milliseconds, that it takes for one request to pass through the disk, including any waiting time.
The average number of requests to the disk on a per second basis. Total throughput includes both read and write requests.
• Read Throughput (I/O/sec)
The average number of read requests to the disk per second.
• Write Throughput (I/O/sec)
The average number of write requests to the disk per second.
• Read Bandwidth (MB/s)
The average amount of data read from the disk in Mbytes per second.
• Write Bandwidth (MB/s)
The average amount of data written to the disk in Mbytes per second.
• Average Busy Queue Length
The average number of requests waiting at a busy disk to be serviced,
including the request that is currently in service.
CLARiiON SP, LUN and DISK performance data is retrieved and processed daily. Raw performance data is kept for a longer term, i.e. 180 days, and CLARiiON performance reports are kept indefinitely for performance trend analysis.
If you have a multihomed host and are running like :
· IBM AIX,
· HP-UX,
· Linux,
· Solaris,
· VMware ESX Server (2.5.0 or later), or
· Microsoft Windows
you must create a parameter file for Navisphere Agent, named agentID.txt
About the agentID.txt file:
Line1: Fully-qualified hostname of the host
Line 2: IP address of the HBA/NIC port that you want Navisphere Agent to use
For example, if your host is named host28 on the domain mydomain.com and your host contains two HBAs/NICs, HBA/NIC1 with IP address 192.111.222.2 and HBA/NIC2 with IP address 192.111.222.3, and you want the Navisphere Agent to use NIC 2, you would configure agentID.txt as follows:
host28.mydomain.com
192.111.222.3
To create the agentID.txt file, continue with the appropriate procedure for your operating system:
1. Using a text editor that does not add special formatting, create
or edit a file named agentID.txt in either / (root) or in a directory of your choice.2. Add the hostname and IP address lines as described above. This file should contain only these two lines, without formatting.
3. Save the agentID.txt file.
4. If you created the agentID.txt file in a directory other than root, for Navisphere Agent to restart after a system reboot using the correct path to the agentID.txt file, set the environment variable EV_AGENTID_DIRECTORY to point to the directory where you created agentID.txt.
5. If a HostIdFile.txt file is present in the directory shown for your operating system, delete or rename it. The HostIdFile.txt file is located in the following directory for your operating system:
AIX :- /etc/log/HostIdFile.txt
HP-UX :- /etc/log/HostIdFile.txt
Linux :- /var/log/HostIdFile.txt
Solaris :- /etc/log/HostIdFile.txt
6. Stop and then restart the Navisphere Agent.
NOTE: Navisphere may take some time to update, however, it should update within 10 minutes.
7. Once the Navisphere Agent has restarted, verify that Navisphere Agent is using the IP address that is entered in the agentID.txt file. To do this, check the new HostIdFile.txt file. You should see the IP address that is entered in the agentID.txt file.The HostIdFile.txt file is in the following directory for your operating system:
AIX :/etc/log/HostIdFile.txt
HP-UX :/etc/log/HostIdFile.txt
Linux :-/var/log/HostIdFile.txt
Solaris :-/etc/log/HostIdFile.txt
For VMware ESX Server 2.5.0 and later
1. Confirm that Navisphere agent is not installed.
2. Using a text editor that does not add special formatting, create or edit a file named agentID.txt in either / (root) or in a directory of your choice.
3. Add the hostname and IP address lines as described above. This file should contain only these two lines, without formatting.
4. Save the agentID.txt file.
5. If you created the agentID.txt file in a directory other than root, for subsequent Agent restarts to use the correct path to the agentID.txt file, set the environment variable EV_AGENTID_DIRECTORY to point to the directory where you created agentID.txt.
6. If a HostIdFile.txt file is present in the /var/log/ directory, delete or rename it.
7. Reboot the VMWARE ESX server.
8. Install and start Navisphere Agent and confirm that it has started.
NOTE: Before installing Navisphere Agent, refer to the EMC Support Matrix and confirm that you are installing the correct version.
NOTE: If necessary, you can restart the Navisphere Agent
NOTE: Navisphere may take some time to update, however, it should update within 10 minutes.
9. Once the Navisphere Agent has restarted, verify that Navisphere Agent is using the IP address that is entered in the agentID.txt file. To do this, check the new HostIdFile.txt file which is located in the /var/log/ directory. You should see the IP address that is entered in the agentID.txt file.
For Microsoft Windows:
1. Using a text editor that does not add special formatting, create a file named agentID.txt in the directory C:/ProgramFiles/EMC/Navisphere Agent.
2. Add the hostname and IP address lines as described above. This file should contain only these two lines, without formatting.
3. Save the agentID.txt file.
4. If a HostIdFile.txt file is present in the C:/ProgramFiles/EMC/Navisphere Agent directory, delete or rename it.
5. Restart the Navisphere Agent
6. Once the Navisphere Agent has restarted, verify that Navisphere Agent is using the correct IP address that is entered in the agentID.txt file. Either:
· In Navisphere Manager, verify that the host IP address is the same as the IP address that you you entered in the agentID.txt file. If the address is the same, the agentID.txt file is configured correctly.
· Check the new HostIdFile.txt file. You should see the IP address that is entered in the agentID.txt file.
We have discussed about CLARiiON. How to create LUN,RAID Group etc. before I shold discuss about adding storage to host. I must discuss about Navisphere Host agent. This is most important service/daemon which runs on host and communicate with CLARiiON. Without Host agent you can not resgister host with storage group automatically. Then if you want register host with Navishere Host agent then you need to register manually.
· Send drive mapping information to the attached CLARiiONstorage systems.
· Monitor storage-system events and can notify personnel by email, page, or modem when any designated event occurs.
· Retrieve LUN WWN (world wide name) and capacity information from Symmetrix storage systems.
You can change the storage system password in Navisphere Manager as follows:
1. Open Navisphere Manager
2. Click Tools > Security > Change Password.
3. In the Change Password window, enter the old (current) password in the Old Password text box.
4. Enter the new password in the New Password text box and then enter it again in the Confirm New Password text box.
5. Click OK to apply the new password or Cancel to keep the current password.
6. In the confirmation popup, click either Yes to change the password or No to cancel the change and retain your current (old) password.
Note: If you click Yes, you will briefly see "The operation successfully completed" and then you will be disconnected. You will need to log back in using the new password.
I am going to demonstrate full LAB exercise of CLARiiON. If anybody interested to any specific LAB exercise please send me mail I will try to help and give LAB exercise. There are many exercise like:
1) Create RAID Group
2) Bind the LUN
3) Create Storage Group
4) Register the Host
5) Present LUN to Host
6) Create Meta LUN etc.
CLARiiON LAB Session -I
I am going to demonstrate LAB Exercise for Allocation Storage to Host from CX Array using Allocation Wizard of Navisphere Manager. I will be giving demo other method as well like allocating storage without wizard because some time host will not login to CX Frame. I will be discussing command line as well who are more interested in scripting.
Steps 1:
Login to Navisphere Manager ( Take any IP of any SP’s in your domain and type on browser).
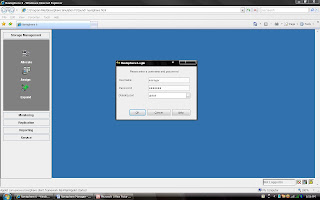
You can see the all the clariion listing under each Domain.
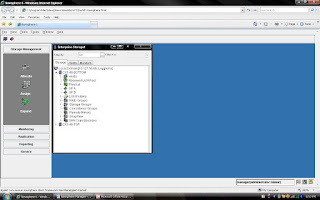
Steps 2: Click Allocation on Left Side Menu Tree.
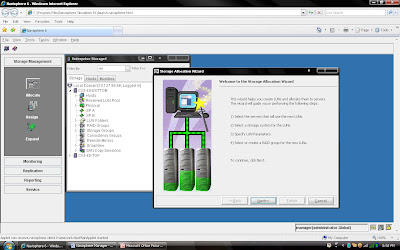
Steps 3: Click next once you have selected Host name (Whom you are going to present LUN)
You can select Assign LUN
to this server or you can continue without assigning.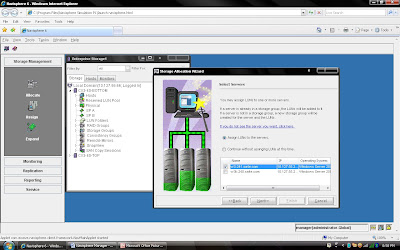
Steps 4: Select Next and Select CX frame where you want to create LUN.
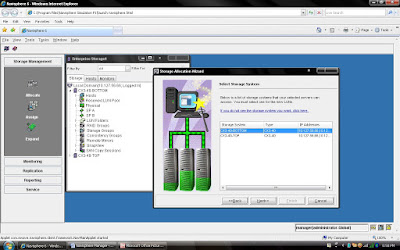
Steps 5: Select Next, If you have created RAID Group It will be listed here otherwise you can create new Raid Group by selecting New Raid Group.( I will be discussing later how to create different RAID Group)
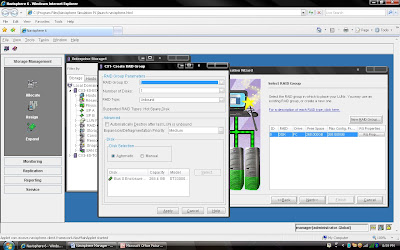
Steps 6: Select RAID Group ID and depending on Raid Group select number of disk for example if you are creating Raid 5 (3+1) then select 4 disks.
Once You have created raid group. It will list under RAID Group dialog box.Click Next and select the Number of LUN you want to create on same RAID Group. For example RAID Group created for 3+1 disk of 500 GB each disk means you can use roughly 500X4X70% GB. Now you want to create different size of each LUN on the same RAID Group
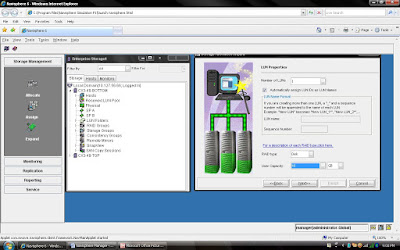
Steps 7: Once you have selected Number of LUN and Size of LUN. You can verify the configuration before you run the finish button.
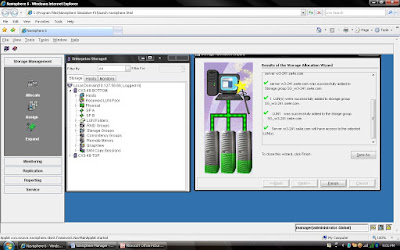
Steps 8: Once you click the Finish Button you can see the status. System will create Storage Group with Server Name (You can change storage group name later) and add created LUN into storage Group.
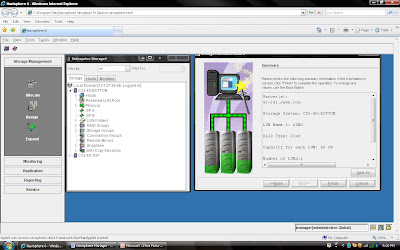
You can verify the entire configuration by clicking storage group name:
About Me

- Diwakar
- Sr. Solutions Architect; Expertise: - Cloud Design & Architect - Data Center Consolidation - DC/Storage Virtualization - Technology Refresh - Data Migration - SAN Refresh - Data Center Architecture More info:- diwakar@emcstorageinfo.com


